|
One technique of image color correction service that I love to apply is one which I've learned from my Photoshop couch Clipping Path Service India - any mistakes in this article are my own and not theirs. Clipping path service India-CPSI is one of the experienced and skilled outsource firms who provides world best clipping path service, image masking service and all kinds of image editing service at reasonable price.  The procedure depends on studying data from the photo and then adjusting the figures that the picture offers. It’s an option to eliminate a color cast that is fairly simple and that requires learning and setting RGB standards rather than making objective choices about a photo. I’ll teach you how to perform this using a photo shot in the very early morning and which is bleary, underexposed and which has really low-quality color.  Step 1 To get started, open up a photo which you really think has the best color cast. Click Window -> Info to shown the Info palette. This provides you with details about the pixels in your photo and additionally, if you’re doing work with a standard image, you’ll have RGB setting exhibited in the upper left corner of the dialog. 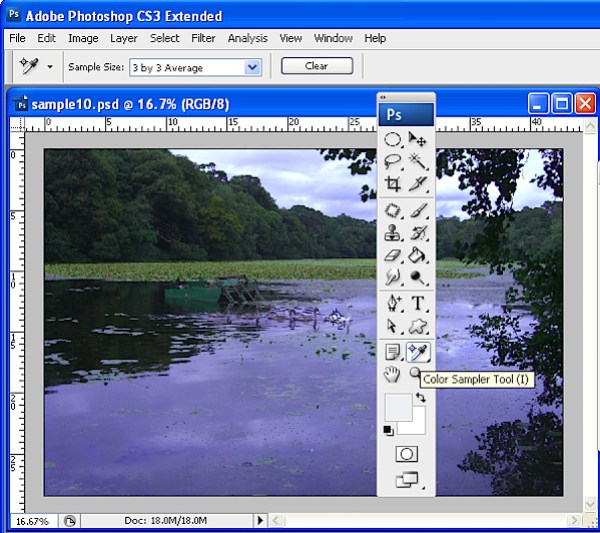 Step 2 To create the color correction I’ll choose the Info palette to show info regarding the photo. To manage this, I’ll require creating several color sample points on the photo and I’ll perform this using the Color Sampler tool which gives a toolbar position with the Eyedropper. Simply click the Color Sampler tool and, from the toolbar, choose the 3 x 3 Average Sample. This is significant as you’ll need to test a larger location than just one pixel.  Step 3 Now discover a place in the photo that must be white or a light neutral gray in color. Simply click on it with the color sampler tool and you’ll notice a marker come out on the photograph with the number 1 next to it. Make sure the point you choose is one that should be white or light gray and don’t pick a location of the photo which is blown out like a light spot. Repeat the procedure, this time period clicking on another point that should be either black, white or a neutral gray. This provides you with a second sample point. You can carry on and include a total of four markers if required. Each one should be put in an area of the photo which should be black, white or a neutral gray.  Step 4 Always check back in the Info palette to see the color info for each of these points. For the lightest points, you should notice values of about 245 for the R, G and B channels. For the darkest points, the value should be about 15 for each one of the channels. For gray points you must have equal values of R, G, and B, even though they can be any value, they just require to be approximately the same for each.  Step 5 In case your photo has a color issue you’ll discover that the numbers at each place are not within a range of 2 or 3 values of each other. To color correction of photo what you’ll manage is adjust the curves for each of these channels to bring them nearer to one another. Pick Layer > New Adjustment Layer > Curves and simply click Ok. You’ll be fixing individual channels so from the Channel drop-down list choose Red and then Ctrl + Click on the first point that you denoted in your photo. This includes a tiny marker on the curve line that tells you where this point in the photo looks on the curve. Determine whether you require enhancing or reducing the value at this point. To enhance it, drag upwards as well as to reduce the value, drag downwards. You’ll notice that you’re not creating personal assessment here; you’re simply adjusting the curve to bring the numbers nearer together and more closely to the desired value of 15 for a black point and 245 for a white one. 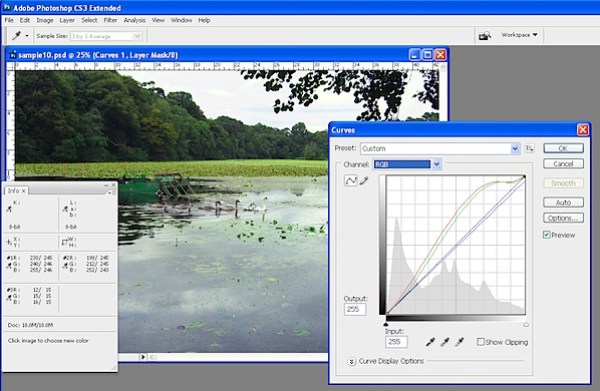 Step 6 Reiterate this last stage for almost all the sample points that you produced on the photo and next repeat it for the Blue and Green channels in order that you can finish with all the sample points comprising values that are within 2 to 3 values of every other. 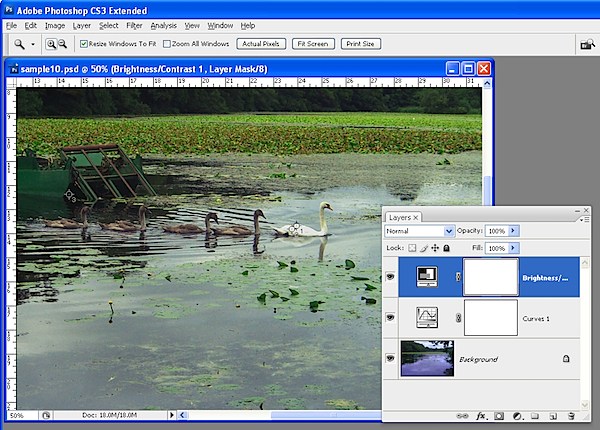 Step 7
Once you’re finished, click Ok to shut down the Curves dialog. You can right now use other fixes like adding contrast to the photo with a further Curves adaptation or utilize the brand-new Brightness/Contrast tool in Photoshop CS3. Thanks for reading this informative article.
2 Comments
|
 RSS Feed
